You have probably seen both. Sprouts in a glass jar by the kitchen sink, rinsed twice a day until they fill the jar. Microgreens in a tray by the window, harvested with scissors when the leaves come in. They look related — they kind of are — but they are genuinely different foods, with different growing methods, different timelines, and different nutrition.
Sprouts are seeds you eat whole — root, stem, and seed — after 5 days in a jar with just water. Microgreens are young leafy greens grown in soil or growing medium for 7 to 21 days, harvested by cutting the stems above the soil line. Same family of foods. Different worlds in how they grow and what they give your body.
Knowing which is which — and what each one brings — is the difference between picking one and growing both. Most people who start growing their own end up with both on rotation. This guide walks through the differences, the nutrition, the safety, the cost, and how to set up either or both at home.
What Is the Difference Between Sprouts and Microgreens?
If you have ever looked at sprouts vs microgreens side by side, you already know they look different. One is tender and crisp, grown in a jar on your countertop. The other is green and leafy, growing in a tray by the window. But the difference goes deeper than appearance — they are genuinely different foods, even when they start from the same seed.
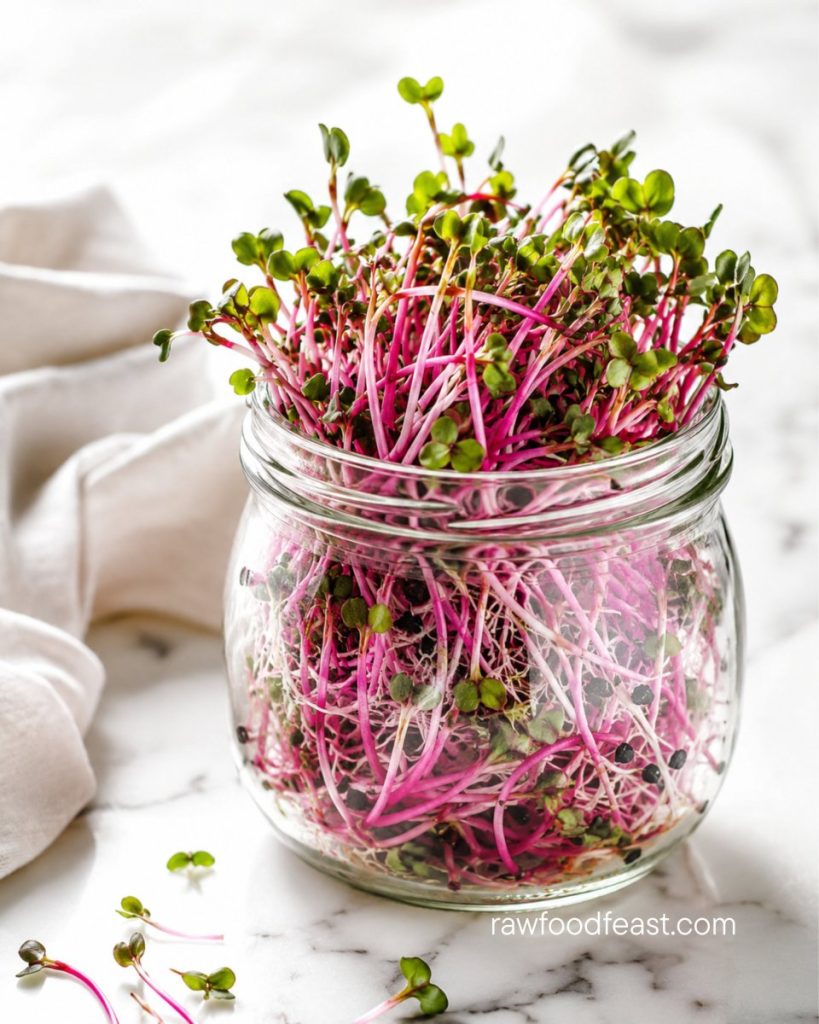
Sprouts grow in a jar with just water. No soil, no light needed. You soak the seeds, rinse them twice a day, and within 5 days you have a jar full of tender sprouts ready to eat. You eat the whole thing — root, stem, and seed. Everything the seed has been building goes straight into your body.
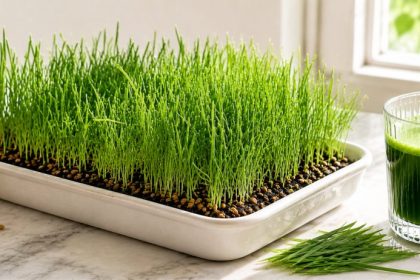
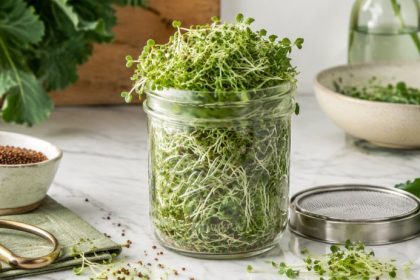
Microgreens grow in trays with soil or a growing medium. They need light. They take 7 to 21 days to reach harvest. And when you harvest them, you cut above the soil line with scissors — stems and leaves only. The root stays behind.
Both are young, nutrient-dense, and alive. Both give you concentrated nutrition that the mature plant cannot match. But the growing method, the timeline, what you eat, and the nutritional profile are all different. The same bag of broccoli seeds grown as sprouts gives you thin white tails rich in sulforaphane. Grown as microgreens, those same seeds give you green leaves with more chlorophyll and carotenoids. One seed, two completely different foods.
And sprouts can be just as beautiful as any microgreen. China rose radish sprouts grow vivid pink stems that make any plate look alive. You do not need a tray and a windowsill to grow something stunning.
How Do You Grow Sprouts vs Microgreens?
Growing sprouts is about as simple as it gets. Soak your seeds overnight in a jar. The next morning, drain the water, rinse the seeds, and tilt the jar at an angle so excess water drains and air circulates. Rinse twice a day — morning and evening. That is it. In 5 days, your jar is full. No soil. No light source. No special equipment. Just a jar, seeds, water, and a few days of patience.
Microgreens ask a bit more. You spread seeds evenly across a moist growing medium — coconut coir or organic soil — in a shallow tray. Cover the tray for a few days to create a blackout period, which encourages the seeds to stretch upward as if they were pushing through soil to reach the light. Adding a small weight on top during this stage is helpful — a second tray with something on top of it works perfectly. The weight pushes the seeds firmly into the growing medium for better moisture contact and encourages stronger, more uniform root growth across the whole tray.
After the blackout period, move the tray to a bright spot. A windowsill works for many varieties. Mist daily. Keep the airflow moving. In 7 to 21 days, when the first true leaves appear, harvest by cutting the stems just above the soil line with clean scissors. Cut cleanly and a little higher than you think — if you cut too close to the growing medium, the root ends grip the soil and are harder to remove afterward.
The difference in effort is real but not huge. Sprouts need about 30 seconds of attention twice a day. Microgreens need daily misting, a light source, and a little more awareness of airflow and moisture levels. Both are genuinely easy. But when it comes to growing sprouts vs microgreens for the first time, sprouts are the gentler entry point by a wide margin.
Are Microgreens More Nutritious Than Sprouts?
This is the question everyone asks, and the honest answer is: neither is universally better. They are nutritionally different because they grow differently, and those differences complement each other beautifully.
Sprouts are higher in enzymes — and this matters more than people realize. Because you eat the whole sprout raw, including the seed where enzyme activity is at its peak, you get the full enzymatic power of germination. Sprouting also breaks down phytic acid — the compound in unsprouted seeds that locks up minerals like zinc, iron, and calcium. Once that phytic acid is broken down, those minerals become available to your body in a way they were not before. Sprouts are also rich in amino acids, the building blocks your body uses to make protein.
Microgreens are higher in vitamins C, K, and E, in carotenoids like beta-carotene and lutein, and in chlorophyll — the deep green pigment that supports your blood and your cells. This makes sense when you think about it. Microgreens have spent days in the light, actively producing these compounds through photosynthesis. They have had more time to build the nutrition that light creates.
Both are dramatically more concentrated than the mature plant. A handful of broccoli sprouts contains 10 to 100 times more sulforaphane than a head of mature broccoli. Sunflower microgreens deliver far more vitamin E per gram than mature sunflower leaves. The concentration is the whole point — and you get it from both.
The real answer to the microgreens vs sprouts nutrition question is that they belong together. Sprouts bring the enzymes, the mineral availability, and the amino acids. Microgreens bring the vitamins, the chlorophyll, and the carotenoids. Together, they cover ground that neither covers alone.
For a deeper look at what happens inside a seed during germination — and why sprouted food is so different from unsprouted — this article walks through the full picture: Benefits of Sprouting.
Are Microgreens Safer Than Sprouts?
You will hear this concern come up, and it deserves a straight answer. Sprouts grow in warm, moist, enclosed conditions — which also happens to be where bacteria can grow if you are not following basic hygiene. That is not a reason to avoid sprouting. It is simply a reason to do it right.
In 2023, Dr. Jed Fahey at Johns Hopkins, along with Jack Smilovitz Burak and Doug Evans, published a reappraisal of 25 years of FDA surveillance data on sprout safety in the journal Food Frontiers. Their conclusion was clear: when responsibly produced, sprouts are not only highly nutritious — they are very safe. And homegrown sprouts, the paper specifically notes, are even safer than commercial. People sprouting at home with good seeds, clean equipment, and basic hygiene are in remarkably safe territory.
The most important factor is seed quality. Buy seeds from reputable suppliers who batch-test for pathogens. This is the single biggest thing you can do for safe sprouting, and it is easier than ever — dedicated sprouting companies now test every batch before it reaches you.
After that, the basics keep everything clean: rinse your sprouts thoroughly twice a day with fresh water, make sure your jar drains completely so seeds are never sitting in standing water, and keep your equipment clean. People have been sprouting safely at home for decades using exactly these steps. It is not complicated or risky. It is just about consistency.
Microgreens do have a natural advantage in this area. They grow in open, ventilated conditions with light, and you do not eat the root or the growing medium. That airflow and exposure to light create an environment where bacteria are far less likely to build up.
Both are safe when done with basic care. The key for sprouts: good seeds, clean equipment, proper drainage, consistent rinsing. The key for microgreens: clean trays, fresh growing medium, good airflow. Neither method requires anything complicated. When people ask are microgreens safer than sprouts, the real answer is that both are safe — the difference is in the growing conditions, not the risk level. Both are well within what anyone can handle in a normal kitchen.
Which Is Easier to Grow — Sprouts or Microgreens?
Sprouts, without question. A jar, some seeds, water, five days. That is the entire setup. No soil, no light source, no trays, no misting schedule, no grow lights. If you have never grown anything before in your life, this is where to start. Sprouting is the most forgiving, most affordable, most low-maintenance way to grow your own food — and the reward comes fast. In less than a week, you have a jar full of fresh, living food you grew yourself.
Microgreens are still simple — but they ask more of you. You need trays, a growing medium, a light source (a bright windowsill works for many varieties, though a small grow light gives more consistent results), and 1 to 3 weeks of daily attention. Misting, checking moisture levels, watching for mold if airflow is not ideal. None of this is hard. But compared to the beautiful simplicity of jar sprouting, microgreens are a step up in involvement.
The recommendation for anyone asking sprouts or microgreens for beginners: start with sprouts. Fall in love with growing your own food. Watch a seed become something you eat in less than a week. Then, when you are ready for the next step, add microgreens.
You can start sprouting with a basic jar and a mesh lid for very little. And if you want the best results — perfect airflow, proper drainage, and batch-tested organic seeds grown from varieties that naturally contain the highest nutrient levels — a purpose-built sprouter makes a real difference. The tilt, the ventilation, the seed quality all matter, and they add up to sprouts that taste better and grow more reliably. The Sprouting Company carries exactly this — purpose-built sprouters and batch-tested organic seeds designed specifically for home sprouting.
Use discount code RAWFOODFEAST to save at The Sprouting Company on all products.
How Much Does It Cost to Start Growing Sprouts and Microgreens?
Sprouting is one of the most affordable ways to grow nutrient-dense food at home. A basic jar with a mesh lid and a bag of sprouting seeds is all you need to get started. A single quarter cup of dry seeds fills a jar with fresh sprouts in less than a week. Compare that to buying a small container of sprouts at the store — growing your own is dramatically cheaper, dramatically fresher, and you know exactly how they were handled.
For a premium setup with a purpose-built sprouter and high-quality batch-tested seeds, the investment is more upfront — but the results, the ease, and the experience match. And the ongoing cost stays low because seeds go a long way.
Microgreens cost a bit more to start. You need shallow trays, a growing medium like coconut coir or organic soil, seeds in slightly larger quantities since you spread them across the tray surface, and ideally a small grow light — though a bright south-facing windowsill handles many varieties well. The startup is still very affordable compared to buying microgreens at the grocery store, where a small clamshell of sunflower or pea shoot microgreens can run several dollars. Growing your own gives you trays full of greens for a fraction of that cost.
Broccoli is one of the best seeds to start with for either method — affordable, fast-growing, and packed with sulforaphane whether you grow it as a sprout or a microgreen. The full breakdown of what makes broccoli sprouts so nutritionally powerful is covered in Broccoli Sprouts Benefits.
How Do You Set Up a Microgreen Shelf at Home?
If a single tray on a windowsill is your starting point, that is perfect. Most people stay there for months or even years and grow plenty. But the moment you want to grow several varieties at once — pea shoots and sunflower greens and beet microgreens and broccoli all rotating through the same kitchen — a shelf with grow lights is the upgrade that changes everything.
The setup is simpler than it sounds. A basic wire shelving unit with three or four levels. A full-spectrum LED grow light strip for each level, suspended a few inches above the trays. A timer that runs the lights for 12 to 16 hours a day depending on the variety. Trays on each shelf, each one at its own stage — some just covered for blackout, some pushing toward harvest, some already harvested and reset for the next round.
Once it is set up, the maintenance is small. Check the moisture. Rotate the trays. Harvest what is ready. Every variety you have ever wanted to try is on the table at once.
Can You Grow the Same Seeds as Sprouts or Microgreens?
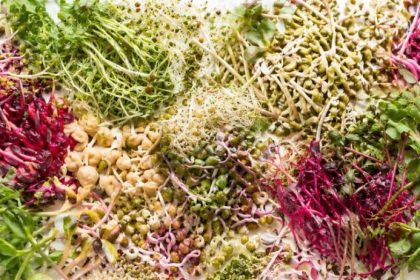
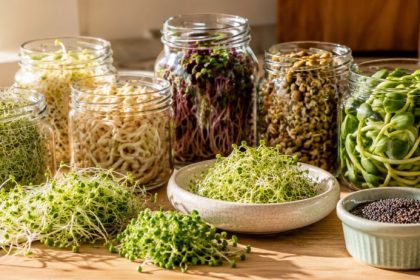
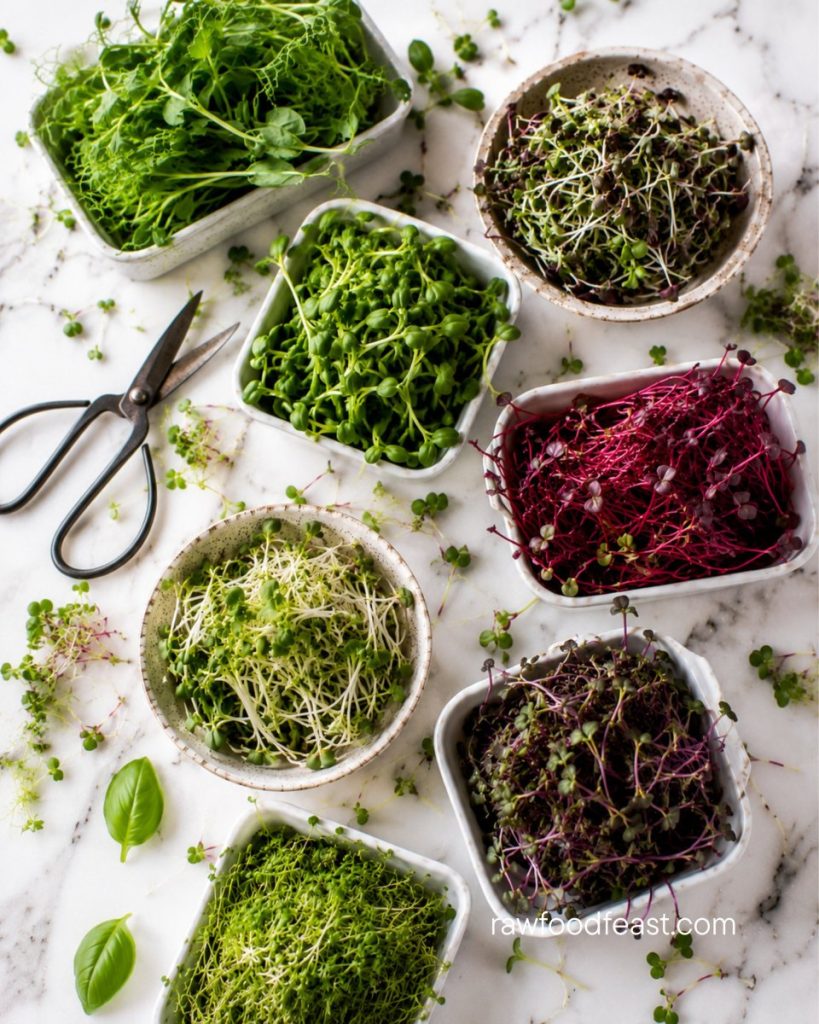
Yes — and this is one of the most fascinating things about this whole space. Many seeds work beautifully for both methods. Broccoli, radish, sunflower, pea, alfalfa, kale — the same seeds, grown two different ways, giving you two completely different foods.
Take broccoli. Grown as a sprout, you get thin white tails with a mild, slightly peppery flavor and the highest concentration of sulforaphane — the compound your body uses to activate its own detox pathways. Grown as a microgreen, those same broccoli seeds produce delicate green leaves with a slightly more bitter edge, higher chlorophyll, and more carotenoids from all that time spent in the light.
Sunflower is another perfect example. As a sprout, sunflower seeds produce short, crunchy tails. As a microgreen, they grow into tall, substantial greens with thick stems and broad leaves — one of the most popular and satisfying microgreens to grow. The flavor shifts too. Sunflower microgreens taste nutty and fresh. The sprout is milder and crunchier.
Radish seeds — including china rose — work in both directions. As sprouts, they deliver that signature peppery bite in just 4 to 5 days. As microgreens, the leaves are milder but the stems carry beautiful color, especially the pink and purple varieties.
One bag of seeds, two completely different foods. That is genuinely remarkable when you think about it. The method changes the texture, the flavor, the color, and the nutritional profile. This is what makes the sprouts vs microgreens comparison so interesting — it is not about which is better. It is about what each method draws out of the same seed. Both worth growing.
What About Mucilaginous Seeds Like Chia?
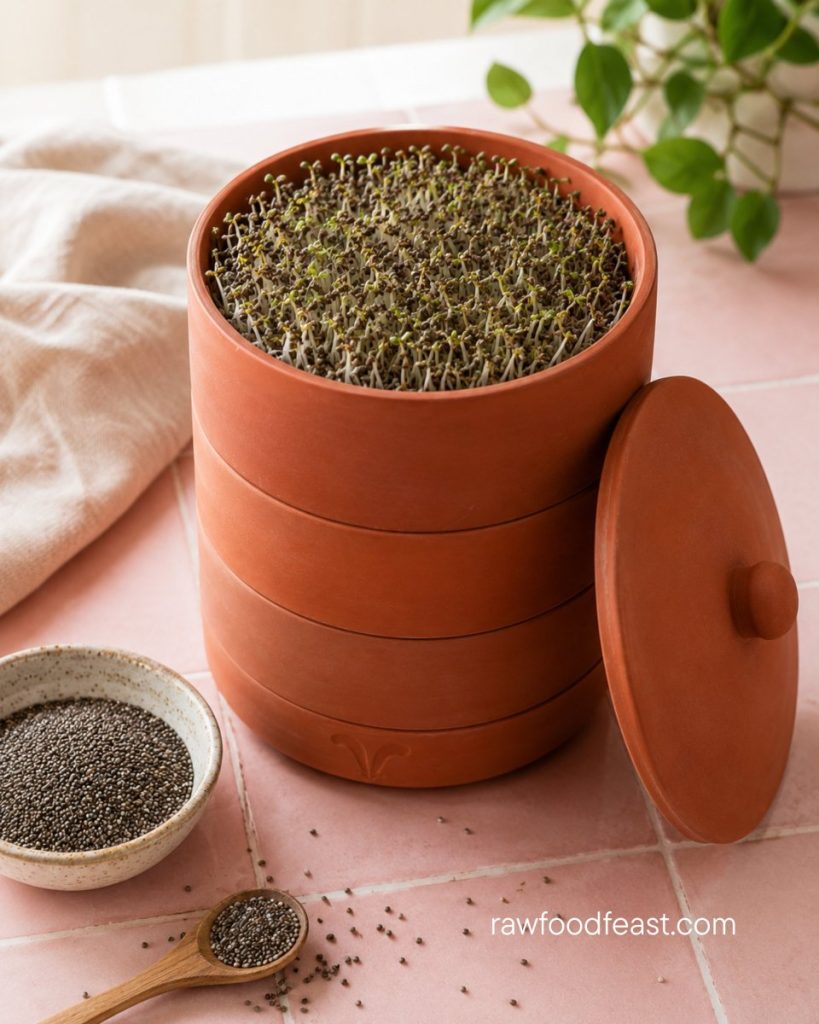
Some seeds do not play nicely in a regular sprouting jar. Chia, flax, cress, and basil are all mucilaginous seeds — they form a gel coating the moment they get wet. If you have ever made chia pudding, you already know exactly what this looks like. That slimy, gel-like coating is the seed doing what it naturally does when it meets water.
The problem is that inside a jar, these seeds clump into a sticky mass instead of sprouting properly. Water cannot drain. Air cannot circulate. The seeds sit in their own gel and things go wrong fast.
The solution is a surface that lets them stay moist without sitting in water. A terracotta sprouter works perfectly for this. The porous clay absorbs excess moisture through the surface while keeping the seeds just wet enough to germinate. You spread the mucilaginous seeds across the damp terracotta, mist them once or twice a day, and they sprout beautifully without clumping. The same terracotta sprouter also works wonderfully for growing microgreens — the clay surface provides the ideal moisture balance for both methods.
If you want to grow chia sprouts, flax sprouts, or cress — and they are all worth growing — just know that a regular jar will not work. A terracotta surface or a dedicated tray for mucilaginous seeds is what you need, and the process is just as simple once you have the right setup.
Can You Grow Sprouts and Microgreens at the Same Time?
Absolutely — and many people do exactly this once they get into it. Different setups, different timelines, same kitchen. Sprout jars on the countertop doing their quiet work. Microgreen trays by the window soaking up light. One gives you food in 5 days, the other in 2 to 3 weeks. Rotate them and you always have something growing, something ready to harvest, and something just getting started.
This is how a kitchen starts to feel genuinely alive. There is always something green. Always something new to eat. You start to notice the rhythm of it — the way lentil sprouts are ready by Wednesday, the pea shoot microgreens by next weekend, the next jar of alfalfa already soaking for tomorrow.
Wheatgrass is a perfect example of how this works in practice. It grows as a microgreen — or technically a grass — in a tray by the window, and you harvest it by cutting and juicing. Fresh wheatgrass juice with pineapple is one of those combinations that tastes far better than it sounds. The pineapple brings natural sweetness and bromelain — a live enzyme that supports digestion — while the wheatgrass delivers chlorophyll and minerals. That combination is covered in detail in Pineapple Juice Benefits.
Growing your own food — even on a small scale, even just a jar and a tray — changes how you think about eating. You begin to see food as something living, something you participate in, not just something you buy. That shift in perspective is explored in What Happens When You Eat Raw Food for 30 Days, which walks through the week-by-week changes that happen when your body starts getting more living food.
What Happens When Your Kitchen Is Always Growing Something?
When you look at sprouts vs microgreens clearly, you see they are not competitors. They are companions. One is fast, simple, and almost effortless. The other takes a little more time and care, but rewards you with color, flavor, and a different kind of nutrition. They fill different roles on your plate and different roles in your kitchen. You do not have to choose.
What changes is the kitchen itself. There are jars tilted on the countertop with seeds slowly waking up. Trays by the window with tiny green leaves reaching toward the light. You rinse your sprouts in the morning while the kettle heats. You mist your microgreens before bed. It takes almost no time. But it adds something to the rhythm of your day that is hard to describe until you have felt it.
You eat what you grow. You watch a seed become food. You notice how fast life moves when the conditions are right — a dry seed becoming a sprout in five days, a flat tray of soil becoming a carpet of green in two weeks. There is something quietly grounding about that. Something that makes your kitchen feel less like a room where you prepare meals and more like a place where food is actually happening.
That is not just an incredible hobby. It is a way of being in your kitchen that changes everything.